VISC 204 Studio | Project 1 | Project 2 | Project 3 | Project 4 | Resources
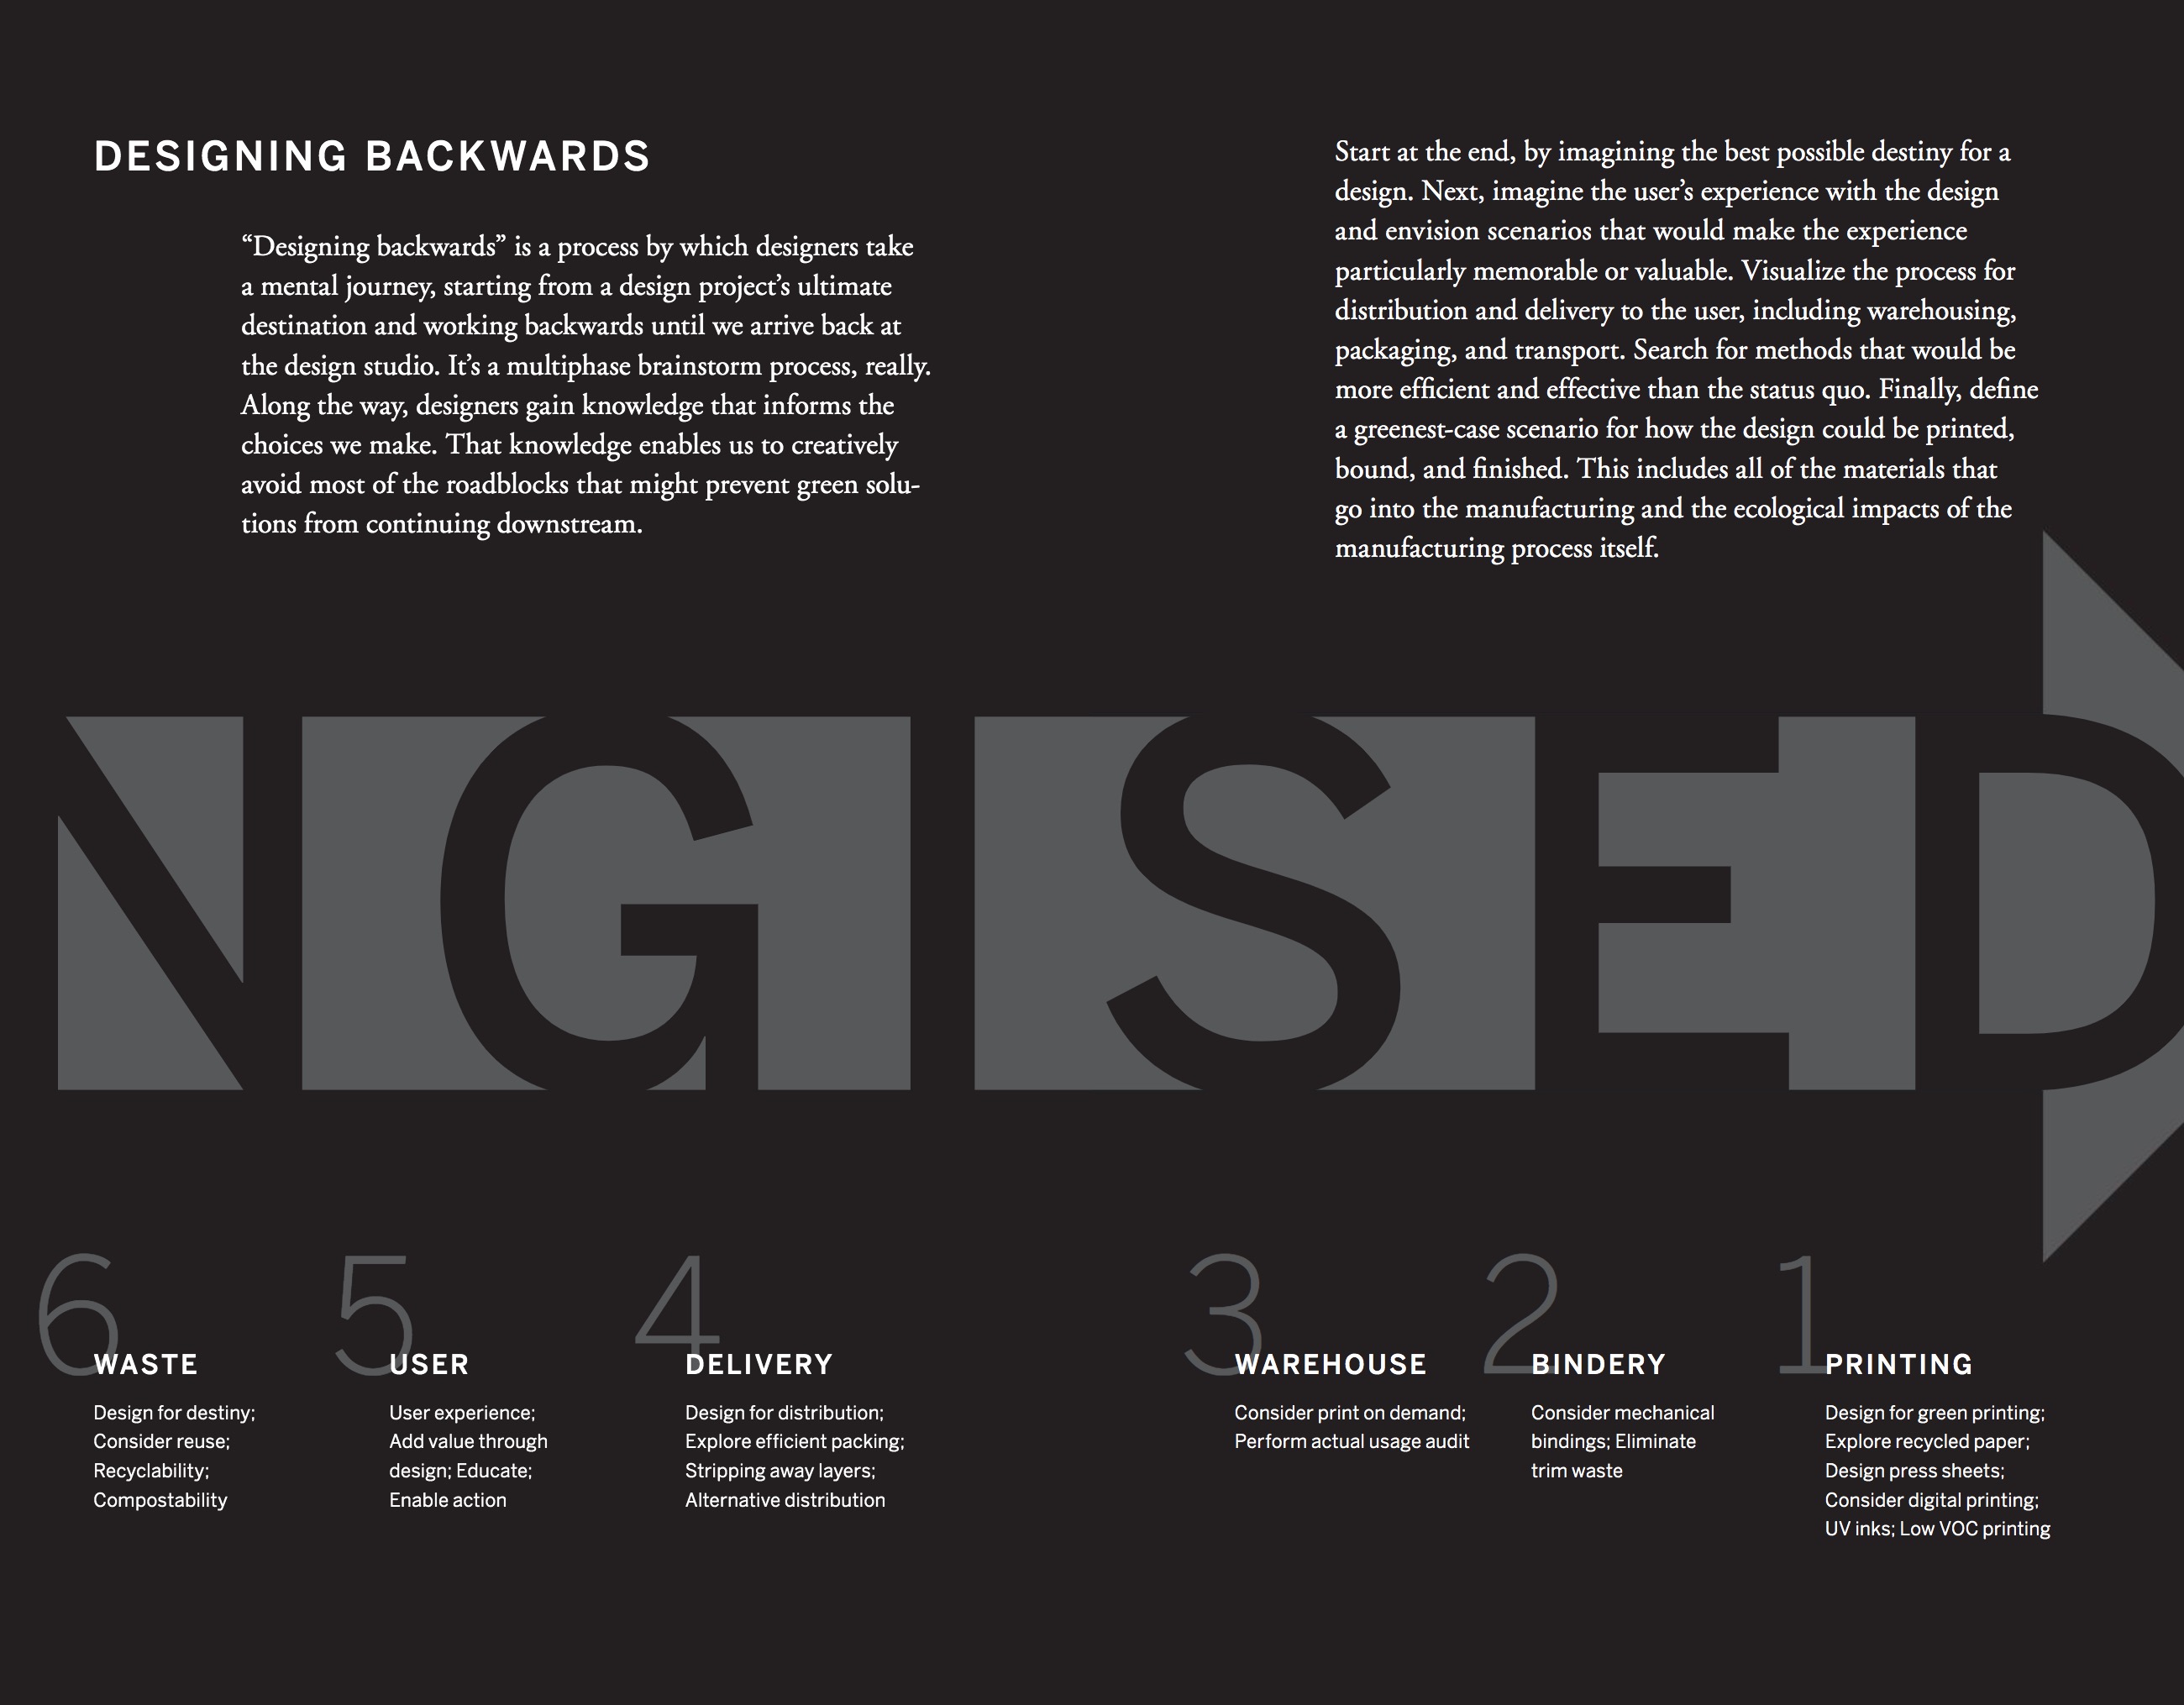 from Green Graphic Design by Brian Dougherty/Celery Design
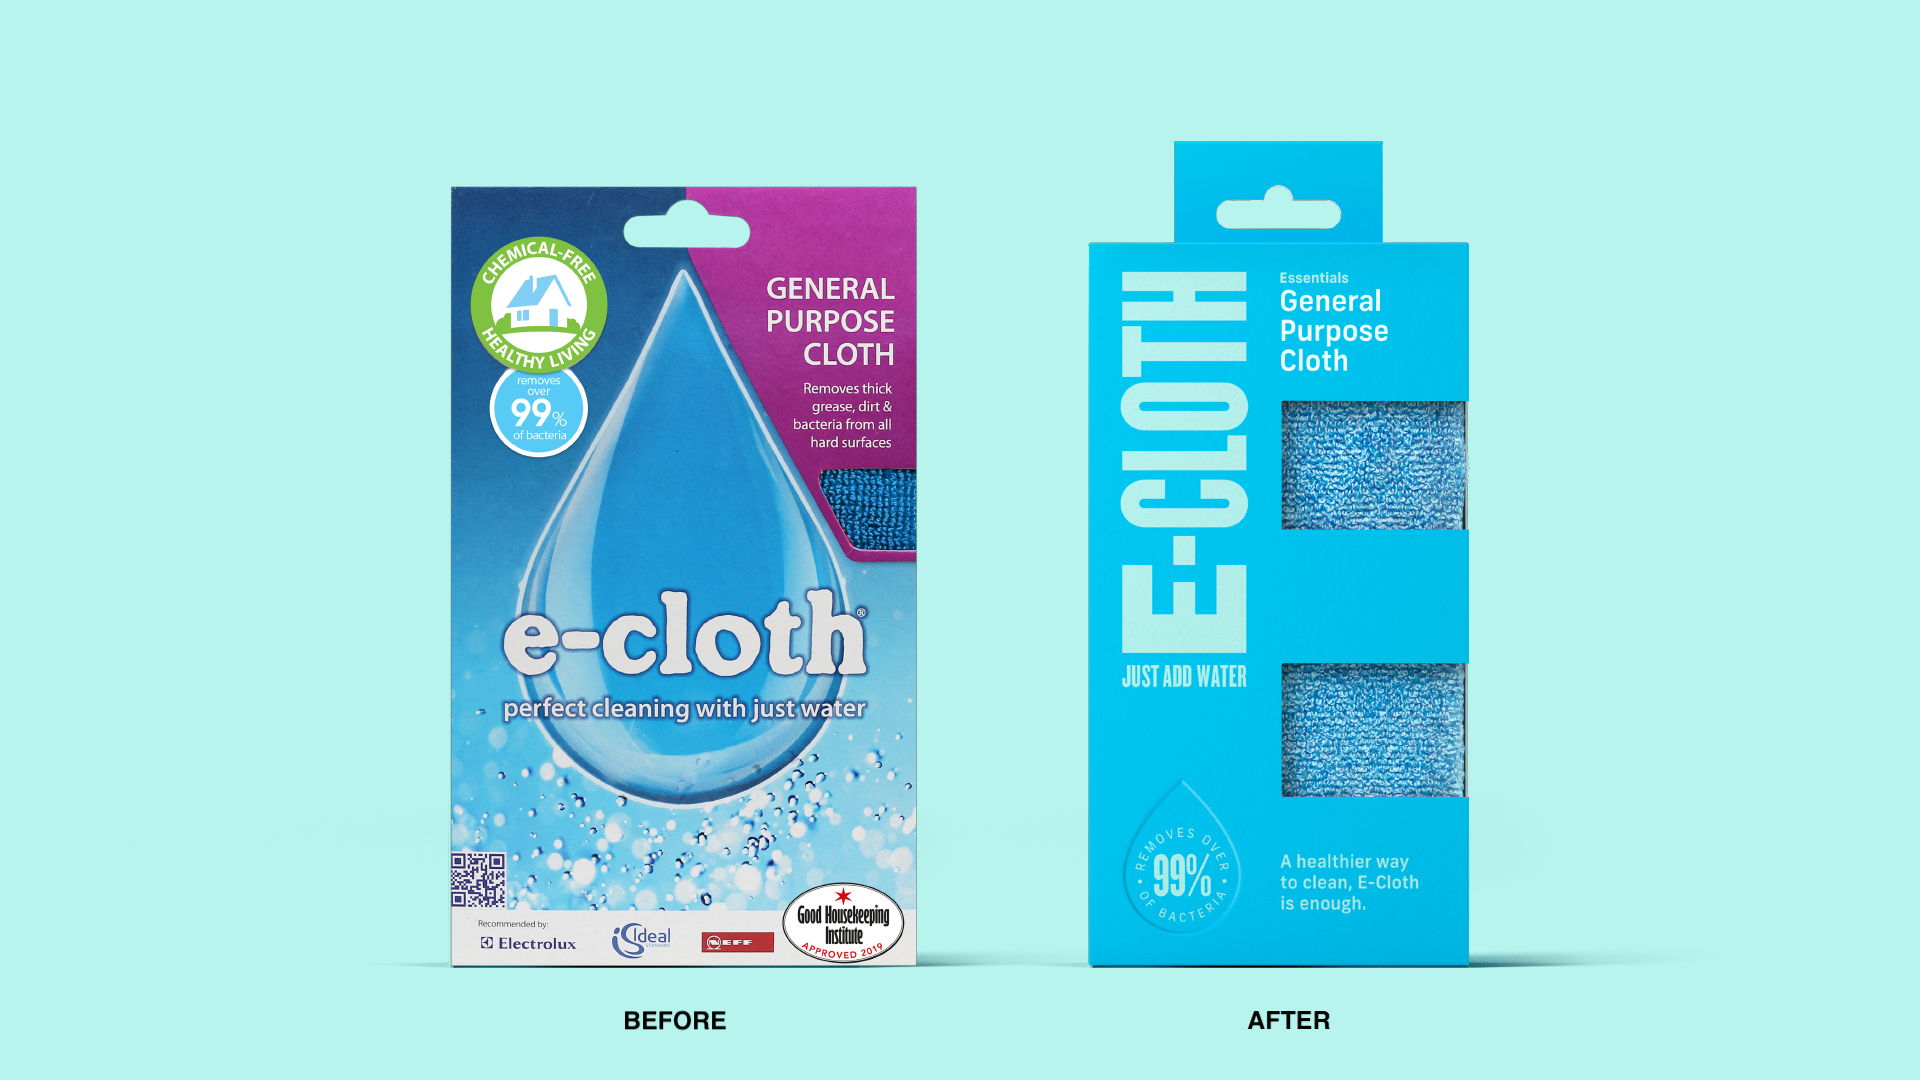
Redesign a packaging experience for a kitchen utensil/office supply/tool with consideration to it’s sustainability. In our throw-away society, manufacturers usually specify their packaging choices based on conventional sizes/materials or perceived budget restraints. Not often enough is consideration is given to the user’s experience of it, how it leverages their brand or how it impacts the environment.
Create a package that expresses how it looks, what is does, what it is like to use it. Pay specific attention to how the package holds the object (protect), shows the object (communicates a story) and is an extension of the experience (so someone can keep the package or be able to up-cycle it).
Designers can have a power impact on all phases of the user experience. Often our involvement is limited to the duties of creating graphics and specifying materials. This project is meant to challenge your design muscles and give you an opportunity to think up and down the entire design process. Research and concept are as the form of the design.
Homework: Choose an art supply and a kitchen utensil from the list that you can buy, already own or can borrow for the duration of this project.
Office & Art supplies (with Brand Name)
Pencils (Carbon)
Paintbrushes (Inkwash)
Pens (Penpoint)
Erasers (Blankspace)
PaperClips (Wire-o)
Scissors (Chop Chop)
Stapler (Standard Staple Co.)
Pushpins (Gallery)
Rubber bands (Binder Brand)
Binder clips (Stack)
Bottle of Ink (Artisan)
Xacto Knife (Cross cut)
Paintbrushes (Inkwash)
Pens (Penpoint)
Erasers (Blankspace)
PaperClips (Wire-o)
Scissors (Chop Chop)
Stapler (Standard Staple Co.)
Pushpins (Gallery)
Rubber bands (Binder Brand)
Binder clips (Stack)
Bottle of Ink (Artisan)
Xacto Knife (Cross cut)
Cooking & Kitchen Utensils (with Brand Name)
Whisk (Mix It Up)
Spatula (Flip Flop)
Garlic Press (Press Co.)
Peeler (Pare & Peel)
Basting Brush (Baste Mode)
Measuring Spoons (Exactly)
Citrus Squeezer (Main Squeeze)
Microplane (Zester)
Meat Thermometer (Chef Tools)
Salt and Pepper Shaker (Sal & Pep)
Chip Clips (Chipper)
Can Opener (Latchkey)
Sponges (Soaked)
For next class visit a store(s) that sells that product and document (photos) audit what’s out there. Audit the package and the experience opening it by asking:
1. How they are packaged (materials, pieces)
2. What do they look like? (graphics, patterns, words)
3. What was it like to open it? (steps, easy, hard, need other tools to open)
4. What are the problems? (too much, plastic, better materials, simpler, etc)
5. What’s the potential? (goals, initial ideas, inspiration, etc)
- - - - - - - - - - - - - - - - - - - - - - - - - - - - - - - - - - - - - - - -
Tuesday November 22nd
- - - - - - - - - - - - - - - - - - - - - - - - - - - - - - - - - - - - - - - -
Quick check in on brand and next steps.
Homework:
Create a simple presentation of 3 (11x17) sheets that communicates your 1: audit, problems/opportunities identified, 2: Your brand snapshot and 3. a moodboard of inspiration of packaging ideas.
Note on Inspiration
Create a mood board that synthesizes anything you have found that inspires your redesign. It could be other packages you like, interesting folds, shapes, paper art, die cuts, etc. Notes. Keywords. Art. Architecture.
- - - - - - - - - - - - - - - - - - - - - - - - - - - - - - - - - - - - - - - -
Tuesday November 22nd
- - - - - - - - - - - - - - - - - - - - - - - - - - - - - - - - - - - - - - - -
Paper Demo:
Bring xacto knives, scissors, glue, tape, bone scorer (or a butter knife)
Start with using points, lines, planes, patterns, shapes, graphics, forms, relationships found on your product and its existing packaging. What about your object is interesting? A line, pattern, curve (see my scissor example below). Could you build a shape, edge, window, fold, panel, flap out of this?
Using existing packaging templates as starting points, create 5-10 paper packaging mockups of solutions to your product. Tape and glue is fine at this stage to wrap and protect your object
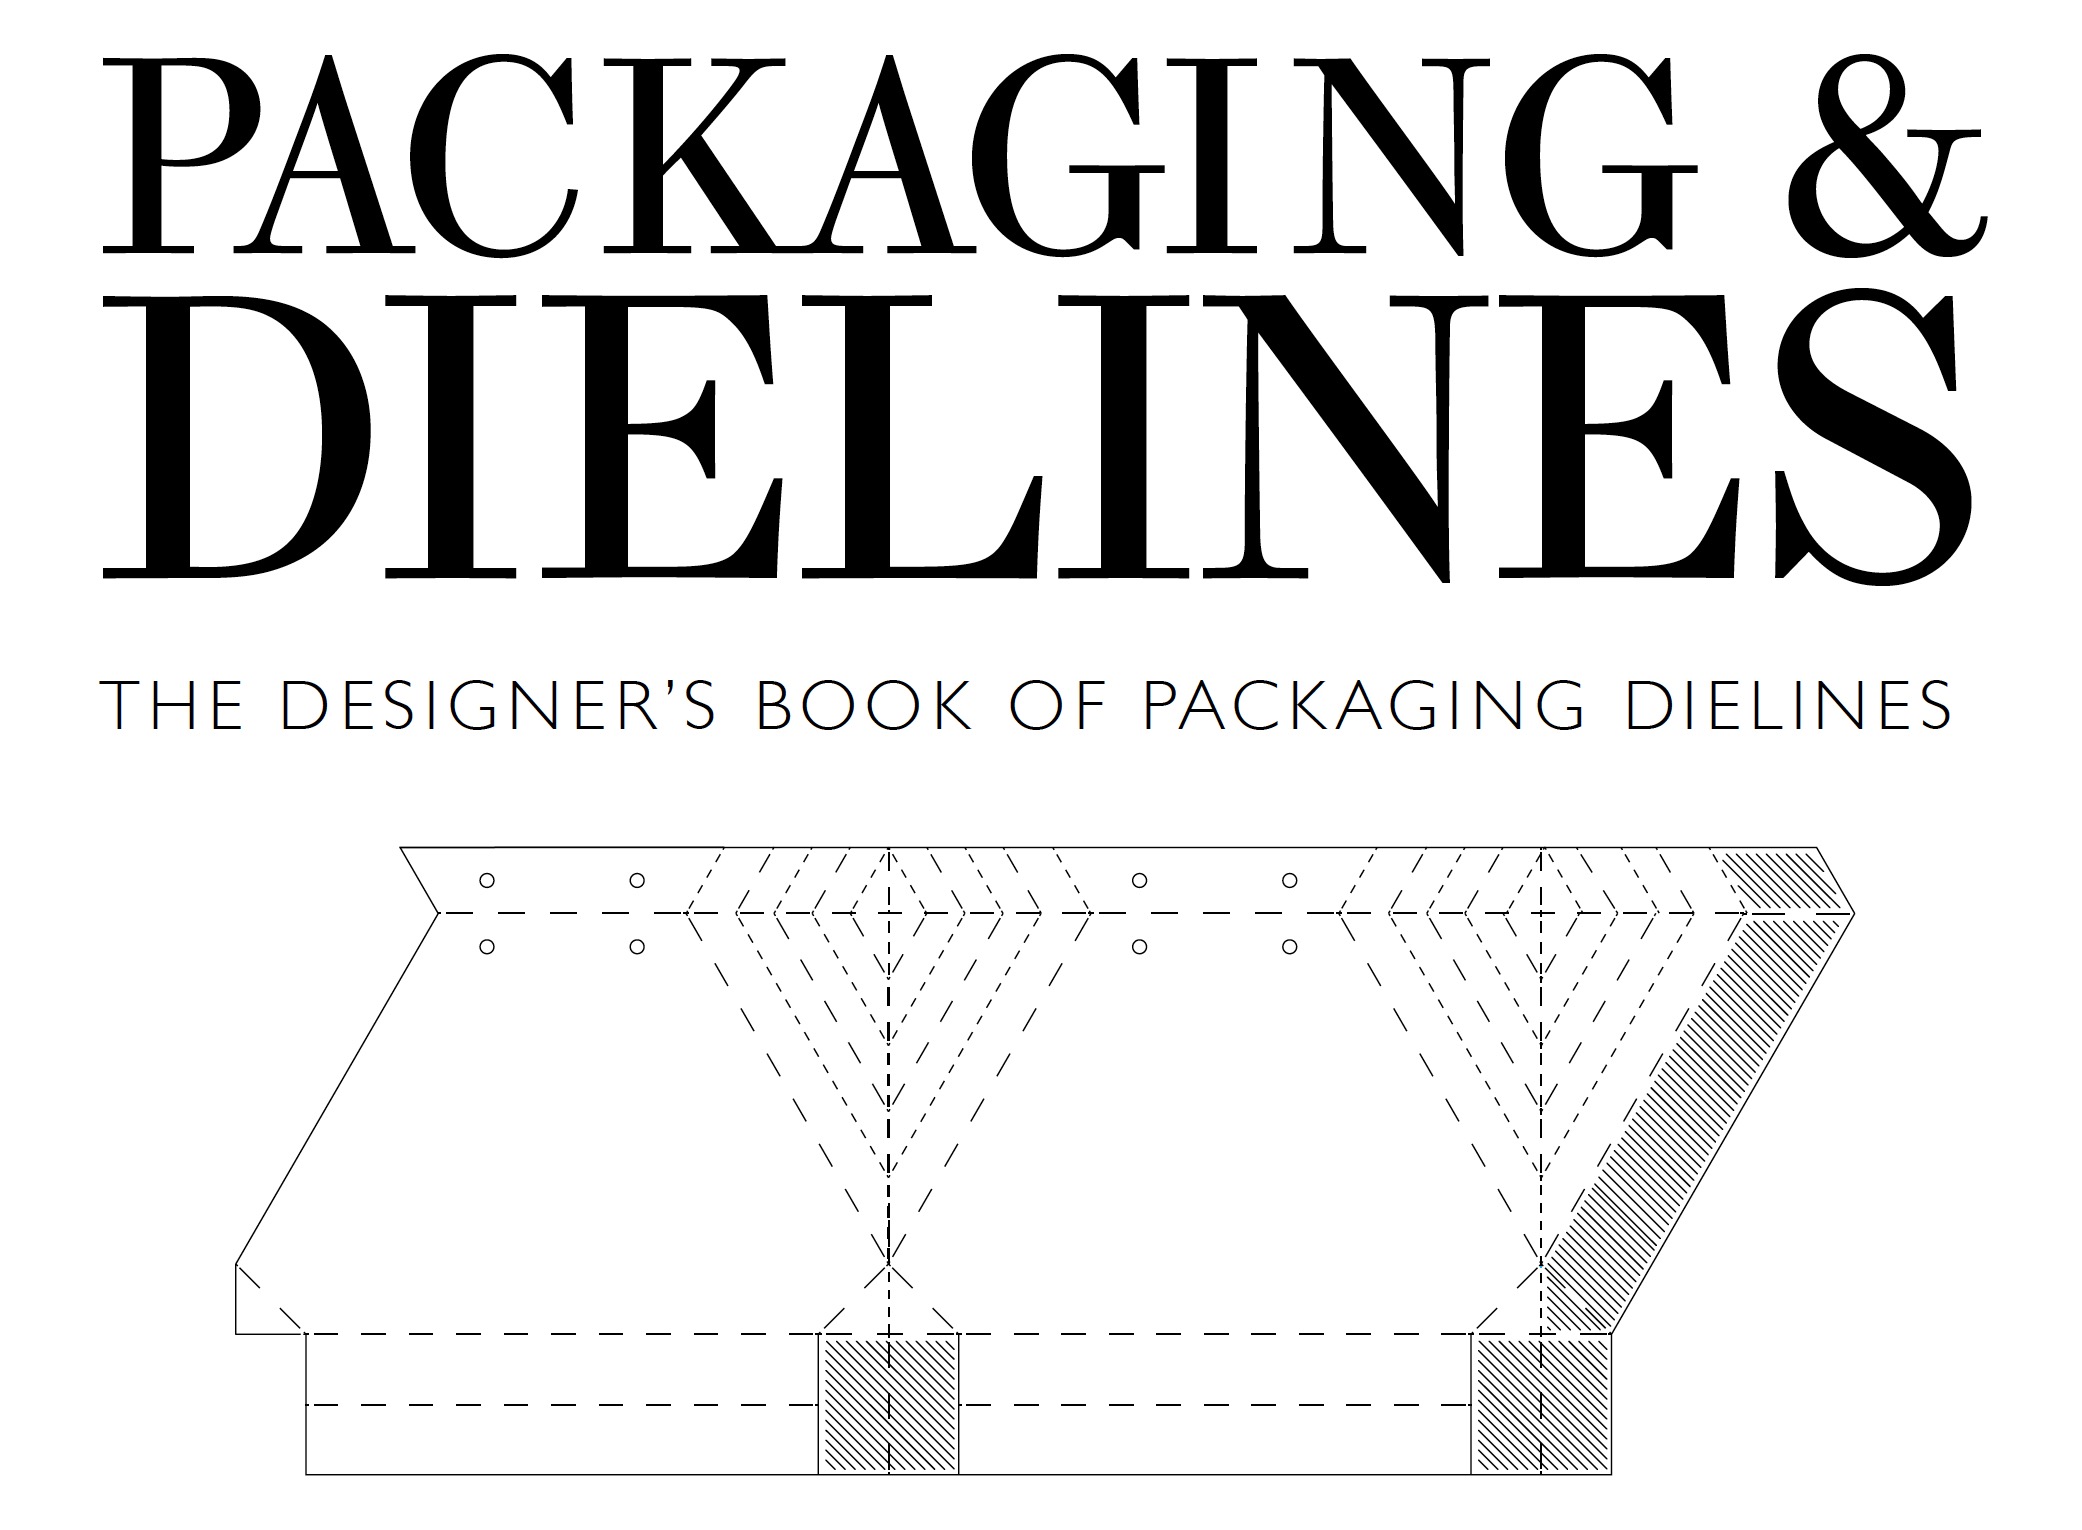
Packaging Templates Located Here!s
Play
MORE PACKAGING TEMPLATES HERE
Look
www.dieline.com
Read
Let my People Go Surfing(the chapter “Philosophies: Product Design”)
Green Graphic Design (esp pages after “Changing the Way we Design”).
- - - - - - - - - - - - - - - - - - - - - - - - - - - - - - - - - - - - - - - -
Note on Concept Sketches and Mockups
Concept sketches can be produced however you feel comfortable. Usually these will be hand sketches or simple mockups, but you may refine these on the computer. Use paper mockups to make things 3d. Concept sketches can also utilize photos of packaging solutions to illustrate your point. Find a way to visualize your ideas.
- - - - - - - - - - - - - - - - - - - - - - - - - - - - - - - - - - - - - - - -
Tuesday November 29th
- - - - - - - - - - - - - - - - - - - - - - - - - - - - - - - - - - - - - - - -
Review Initial Concepts
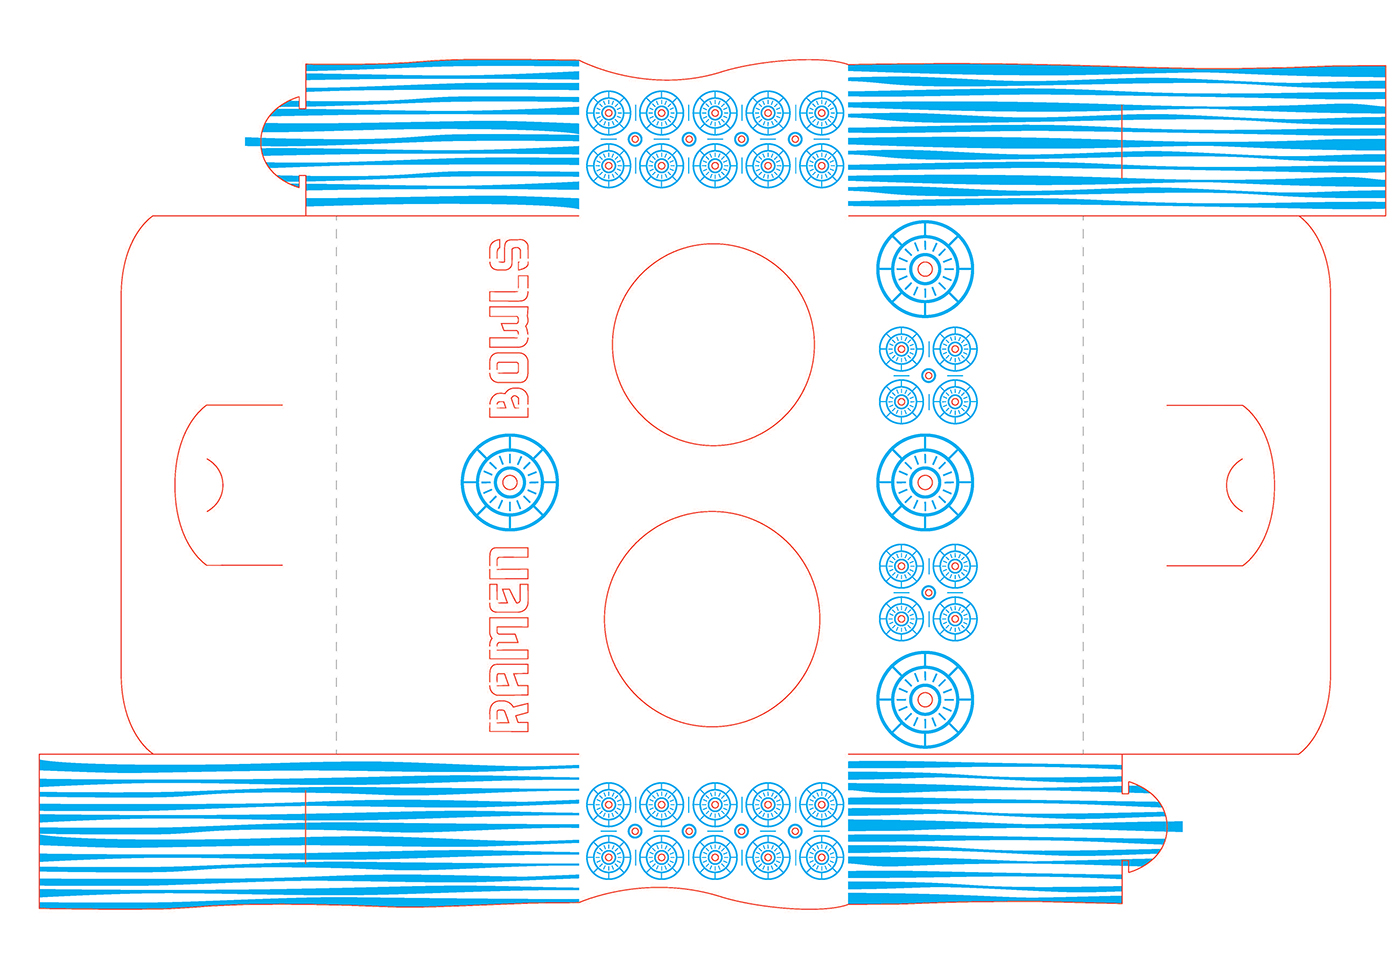
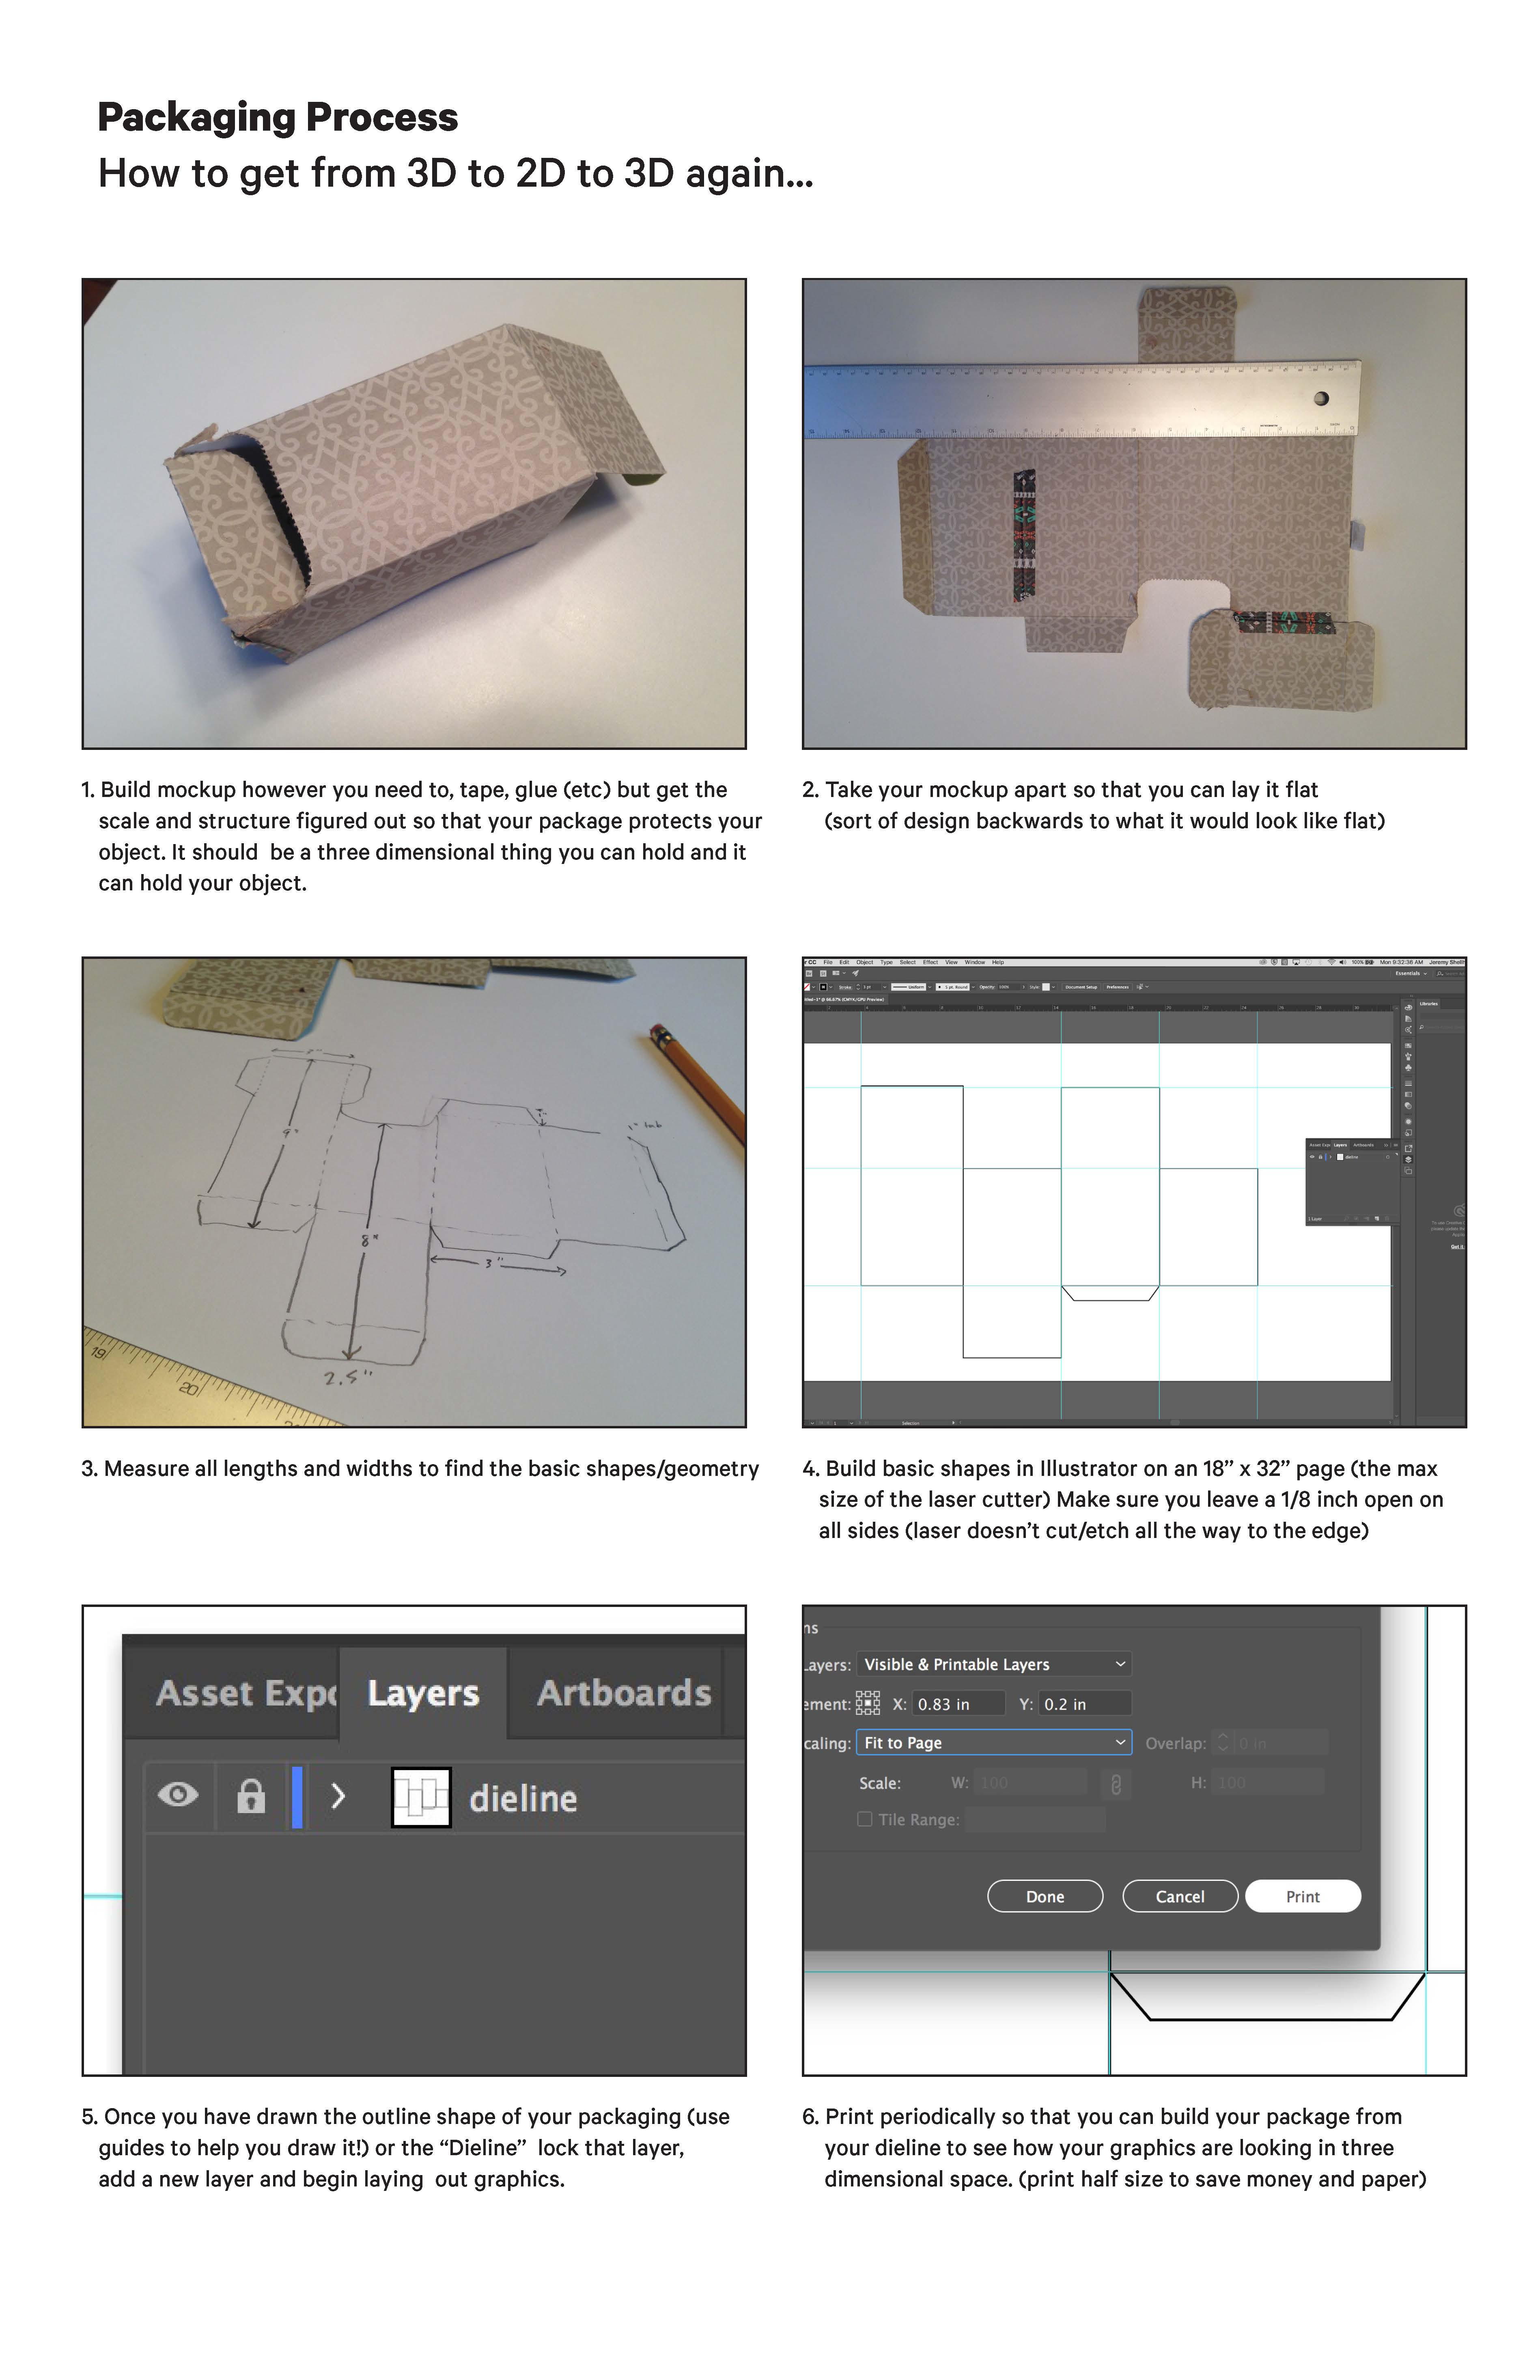
Dieline Demo in Illustrator
Homework:
Translate final packaging concept to Illustrator and draw the dieline.
- - - - - - - - - - - - - - - - - - - - - - - - - - - - - - - - - - - - - - - -
Tuesday December 1st
- - - - - - - - - - - - - - - - - - - - - - - - - - - - - - - - - - - - - - - -
Bring materials to work on mockups in class. Work on dieline and send to Lasercutter for tests!
Homework: Refinements based on feedback
Thursday December 6th
- - - - - - - - - - - - - - - - - - - - - - - - - - - - - - - - - - - - - - - -
Worktime and individual critiques.
Homework:
Apply your brand identity to the packaging dieline and print out. Try 2-3 different versions of applying your brand to the dieline.
- - - - - - - - - - - - - - - - - - - - - - - - - - - - - - - - - - - - - - - -
Thursday December 8th
- - - - - - - - - - - - - - - - - - - - - - - - - - - - - - - - - - - - - - - -
Worktime, final feedback.
Homework:
Everything Due! Final Package with branding, 18 x 24 presentation and final dieline. Upload presentation and dieline to this One Drive Folder
In your presentation takes us through your audit, problem identification, solutions, your brand identity and your final packaging solution. Include your dieline and photographs of your final prototype.
- - - - - - - - - - - - - - - - - - - - - - - - - - - - - - - - - - - - - - - -
Thursday December 15th @ 9:00am
- - - - - - - - - - - - - - - - - - - - - - - - - - - - - - - - - - - - - - - -
Everything Due! Final Package with branding, 18 x 24 presentation with final dieline printed to explain construction. Upload presentation and dieline to this One Drive Folder